Any war is complicated in its genesis. Below are the chain of events that led to Australia fighting in the First World War in France.
The Foundations for War
The foundations of the war had been being laid for some time. To understand its background you must first look at what was happening on a global scale.

Around the world, there had been decades of international tension that had arisen from nationalism. The previous century saw the growth of colonialism and the rise of trade on the high seas. The main pinpointed areas where this occurred were in Africa, Asia and the Pacific.
As colonialism grew, so did the reliance on military power to protect developing colonies. Technological advances in military areas were increasingly being made and these were used to provide support for the new world orders.
The Balkans region in Europe had been built on centuries of wars based on the mix of religion, race and culture. It was a fight looking for a place to happen.
The Catalyst for War
The catalyst to ‘trigger’ the events that led to war, goes like this:
- 18-year-old Bosnian student, Gavril Princip, shot and killed the Archduke Franz Ferdinand, heir to the Austro-Hungarian throne
- Austrians viewed the murder as a Slavonic challenge to the Teutonic (Germanic) world
- Austria believed that Serbia was implicated with this act and declared war on Serbia
- Austrians were confident that Germany would back them in the likelihood of Russia stepping in to support Serbia
- Since the whole political structure of Europe was tied into a series of alliances, any involvement by one member state of an alliance inevitably meant that the other members states would become involved.


The Chain of Events
The chain of events was now set to light the flames of war:
- Tsarist Russia mobilized to support Serbia
- The German Army (at the time the world’s most powerful) advanced to meet in the east, and Russia’s ally, France in the west
- The Germans launched a campaign to crush all French resistance
- To gain an advantage the Germans overran Belgian territory
- Britain, a guarantor of Belgium’s neutrality, declared war on Germany on August 4, 1914
- A British Expeditionary Force was dispatched across the English Channel to France
- The Italians, then allies of Germany and the Austro-Hungarians, turned their backs and support on the central powers and joined the Allies (Britain, France and Russia)
- The Japanese then joined the Allies.
Australia and New Zealand join the war
- On July 29, 1914, Britain sent a message to the Australian government indicating that war was imminent. New Zealand offered a contingent of troops and by the 31st July Canada had done so as well.
- Australian politicians rallied behind the “Mother Country”, England and followed suit. The provision of a joint Australian and New Zealand division had existed between the two countries for some time so consultation was undertaken to determine the requirements of this force.
- The Cabinet decided that a force of 20,000 personnel be sent from Australia. At the time the Australia Army had a strength of 45,645.
- It was determined that this would have to be a voluntary force due to the Defence Act not allowing compulsory service abroad for Australian soldiers.
- On August 4, 1914, Prime Minister Billy Hughes made the announcement of war and the troop offer was announced on August 6, 1914.
- The British government cabled its acceptance and requested the contingent be made available as soon as possible.
- War had begun and Australia was inevitably involved.
Formation of Australia’s initial involvement
Brigadier General William Throsby Bridges was appointed to command the force.

Bridges named it the Australian Imperial Force (AIF). It was composed of infantry, artillery and light horse. Young Australian men joined the volunteer force from wide and far.
Australia’s initial engagements
- The Royal Australian Navy was already deployed at the announcement of war.
- On August 10, 1914, the Royal Australian navy was placed under the control of the British Admiralty.
- The Australian Navy’s first role was to seize German wireless stations across the south-west Pacific and thus neutralize German communications to its colonies and navy. This mission successfully dealt a major blow to the Germans in the region.
- An Australian expeditionary force was dispatched to New Britain (off the east cost of modern-day Papua New Guinea) to take control of German colonial interests in the region, Rabaul was the capital of German interests in the area.
- On August 11, 1914 the Australian Naval and Military Expeditionary Force went ashore to subdue the German forces at Kabakaul near Rabaul. The engagement was quick and decisive with the loss of two Australian officers, four men killed and several wounded in action.
- On September 13, 1914, the Union Jack was raised at Rabaul and within a few weeks most of German New Guinea, Bougainville and the Admiralty Islands were under the control of the Allies.
- On September 21, 1914, 40 German soldiers and 110 local recruits marched into Rabaul and laid down their weapons
Australian and New Zealand troops head for Europe, the ANZAC’s are born
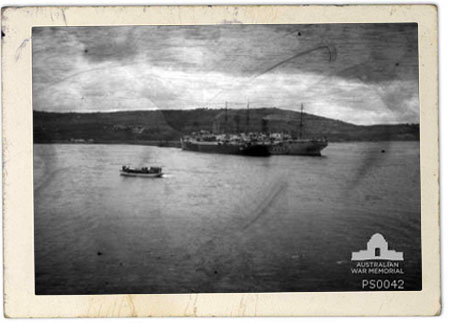
- On November 1, 1914 the 1st AIF departed the harbour in Albany Western Australia for Europe; 36 transport vessels, escorted by four warships.
- The German raider Emden had entered the Indian Ocean, however, its captain was unaware of the Australian convoy in the vicinity.
- On November 9, 1914, The Emden appeared off Cocos Island and sent out a raiding party to destroy the cable and wireless station.
- The AIF convoy close by picked up a distress message from the station. “Strange Ship approaching”, then”‘SOS”‘ followed by silence.
- At 7.15am, HMAS Sydney was sent at full-speed to investigate and two hours later sighted the Emden.
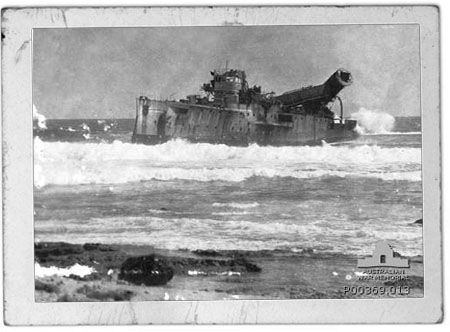
- A naval engagement ensued with the Emden opening first fire at an extreme range and hitting the Sydney 38 times. However, the Sydney replied with 100lb shells inflicting greater damage on the Emden especially to its steering gear. The Emden caught fire and her funnels went over the side.
- By 11am the Emden gave up the fight and the captain, steering by her engines, ran aground onNorthKeeling Island. This engagement basically opened up the Pacific and Indian Oceans for relatively safe transportation free from German interference.
- On November 15, 1914, the troop convey arrived in Colombo.
- HMAS Sydney followed with many wounded German sailors from the Emden. There was a sombre mood when the Sydney arrived as the young Australians had witnessed, for the first time, the horrors of war. Humanity stepped in and gestures of compassion for wounded and dying enemy sailors were made.
- The convoy arrived at Aden at the end of November. The Australians were told that they had been ordered to disembark in Cairo instead of England. There were two reasons for this; the British were having problems accommodating and feeding Canadians and their own troops in Britain, with the onset of winter, Turkey had entered the war on Germany’s side on the 30th of October.
- The Australians and New Zealanders joined to form a corp under General W.R. Birdwood, a British cavalry officer. The corps were named the Australian and New Zealand Army Corp (ANZAC).
On foreign soil
- On December 3, 1914, the Australians disembarked in Alexandria.
- In Cairo they set about training, from there they would be sent into battle.
- On February 1, 1915, the 2nd AIF began arriving in Cairo from Australia.
The bigger picture at large
- Germany knew it had to knock out France to have a decisive edge to deal with Russia (nothing worse than fighting a war on two fronts). The Allies hoped that their Russian counterparts would force the Germans to move substantial forces from France to the east, easing pressure on the Western Front, however, the Russians were thrown out of East Prussia losing a great deal of men. This was August 31, 1914.
- The British Expeditionary Force and the French engaged the Germans and retired at Verdun. The Germans came within 32 kms of Paris but faltered in their attack in early September.
- By September 14, 1915, the Germans were back at the Aisne River. The Germans had weakened as the Allies had hoped for and withdrew to support the efforts in East Prussia.
- Early in 1915, the Russians had their own internal issues to deal with and, to add to their challenges, Turkey had entered the war on Germany’s side, cutting communications between Russia and her western allies through the straits of the Dardenelles.
- Russian ammunition could not get through.
- Turkey started a campaign through Armenia into the Russian Caucasus region and launched another army across the Sinai desert to liberate Egypt from the British and seize control of the Suez Canal. Unfortunately for the Turks it didn’t work.
- Grand Duke Nicholas of Russia was concerned about the Turkish campaign in Caucasus and sent a message to Britain expressing his deep concerns and recommended a diversionary action against Turkey to force them to withdraw from the Caucasus.
- The British came up with a plan to seize Constantinople. If successful they believed they could bring the Balkan states along side then advance along the Danube to the Austro-Hungarian territory.
- Concerned with the increasing loss of life on the Western Front, the British decided to see if a naval engagement could resolve the issue.
- During February and March 1915, a British fleet attacked the outer forts of the Dardenelles with limited results. On the March 15, 1915, a joint British and French Naval force attacked again with greater success, however later in the day three Allied Naval units struck Turkish mines and were lost and the mission was called off. The naval action had failed.
Gallipoli, the plan
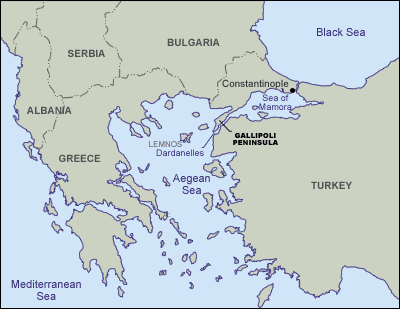
- It was decided that if a joint navy-army expedition force could successfully take the Gallipoli peninsula, it would open the way to Constantinople. There were around 75,ooo allied troops in the region at the time. A British regular division and the ANZACs could offer two divisions, 30,000 Australian and New Zealanders and available was another division Zouaves and Foreign Legionnaires and the Royal Navy Division.
- The Turks were well aware what was going on due to their effective spy network, and the mail labeled “Constantinople Force, Egypt” gave the Turks the opportunity to see how many forces the Allies had put together for the assault.
- The Turks increased their military presence and prepared themselves for the ensuing battles ahead.
- The Allies prepared their operational plans.
- It was decided that the ANZACs would be the first ashore and attempt an assault on the rugged and precipitous environment on the peninsula at Gaba Tepe on the 25 April.
- The British would land around Cape Helles on the toe of the Peninsula, the French at Kum Kale on the Adriatic side of the Dardenelles, the British navy would do their demonstration at Bulair.
Gallipoli, tragedy of purpose triumph of the spirit
In hindsight we can see that the failure of the Gallipoli campaign was one of mismanagement. Another contributing factor was inexperience. They came ashore early in the morning with little resistance, however, they found themselves on a narrow beach (aptly named ANZAC Cove) over which the enemy had open fields of fire and from which the only way out was up the precipitous rugged hills covered by Turkish defences in the hills above.
As the day progressed the engagement turned ugly and treacherous with more troops coming ashore into a small enclave and confused fighting with the Allied soldiers not knowing where the front line was.
The ‘Aussies’ obeying their command to keep going at all costs managed to find their way through ridges and ravines with some of them getting to the top to glimpse the ‘Narrows’ from the highest point. By the afternoon the Turks had counter-attacked forcing the Australians back.

By nightfall the beach head had become a critical point. The ANZACs were besieged in a small area. The British navy offshore could not do anything and calls for reinforcements and ammunition came. The beach was now jammed, casualties had arisen to over 2000 and beach was littered with wounded and dead bodies.
The British at Cape Helles had suffered in their attempts to land also and were also fired upon by Turks. It was another disaster waiting to happen. General Birdwood feared the worst and was persuaded to urge the British commander Hamilton to evacuate. Birdwood was told that his troops must dig in and stick it out.
The Australians set about digging in the rough ground and firing their weapons. Soon the hillside looked like a mining camp and the term “Digger” began to be heard. And so the Gallipoli campaign commenced.
Historian Dr Jeffery Grey breaks the campaign into four natural stages:
- The landing of the 3rd Brigade in the early hours of 25 April 1915, the initial assault upon the Turks which was contained by the Turks thanks to reinforcements
- From May to August which involved the consolidation and expansion of the lodgement area
- During the month of August saw the force at ANZAC Cove take the leading part in a major offensive effort to break the deadlock coordinated with landings further north at Suvla Bay of a new Army formation IX Corps and when this failed with heavy losses, involved the Anzacs in some further straightening of the lines at Hill 60
- From September until the evacuation in mid-December, when it had become clear that the forces involved were exhausted and incapable of further sustained offensive activity.
By December 20, 1915, the ANZAC force had been withdrawn with the withdrawal itself being accomplished with only two casualties. It was deemed to be one of the most successful operations of the campaign.
Even though the campaign militarily had been a disaster, the results for the Allies were valuable. It forced the Turks to focus on Constantinople, thus lessening the pressure on the Middle East and assisting Russia’s defensive position. Turkish losses were in the vicinity of 66,000 deaths.
The Allies had sent half a million men to Gallipoli, 33,352 were killed, 78,518 wounded and 7689 missing. Australian losses were 7600 killed or died of wounds and 19,000 wounded.
Gallipoli has etched itself into Australian history as one of those watershed events where Australia defined itself as a nation in the blood sweat and tears of battle.
On to France
News of Australia’s involvement in the Gallipoli campaign spread and stirred Australians back home. The government leveraged this and the effect of this was an increase in the amount of men coming forward to enlist. The enlistments resulted in the AIF growing by 100,000 between May and September in 1915.
The ANZAC’s were now operating in two Army Corps
- I ANZAC Corps (The 1st and 2nd Australian Divisions and the New Zealand Division)
- II ANZAC Corps (4th and 5th Australian Divisions)
Meanwhile in Europe the war had ramped up. A major offensive by the British and French was being planned in December in 1915, with a goal to launch on July 1, 1916. The Germans saw the making of this and decided to get in first with an assault. The assault on Verdun commenced on February 21, 1916.
The ensuing battle saw Verdun nearly being taken, however the French forces prevailed. Losses on both sides were in the magnitude of 350,000 and both sides had little to show in forward progress for all this carnage. Allied commanders realized that any future engagements would require military strength and it was no surprise when, eight days after the battle began, the 1st and 2nd Australian and the New Zealand division was ordered from Egypt to France. Embarkation commenced 13 March.
In May the 4th and 5th Divisions followed. From that point the AIF was divided and fought in two theatres, the Western Front and the Middle East.
On April 7, 1916, the ANZACs took over from the British 2nd Corp responsibility for the sector of Armentieres, commonly known as “The Nursery” and thus commenced Australia’s engagement in France.
Adapted from:
- ‘A Military History of Australia’ – Dr Jeffery Grey 1 and
- ‘Diggers – The Australian Army, Navy and Airforce in Eleven Wars’ – George Odgers 2